Globe valves have discs that move linearly to allow, restrict or regulate fluid flow. While they are designed as throttle devices to regulate flow through the valve, they are also used in fully open or closed positions to allow or restrict media flow completely.
Globe valve failures result in wasted fluids, reduced functionality of the valve, and damage to the system.
For globe valve failures to be avoided, the valves must be installed correctly, regularly tested, and maintained properly.
This post discusses how to test, install and assemble globe valves. It also highlights some globe valve maintenance practices and steps to replace the valve seats and handles.
How To Test Your Globe Valves
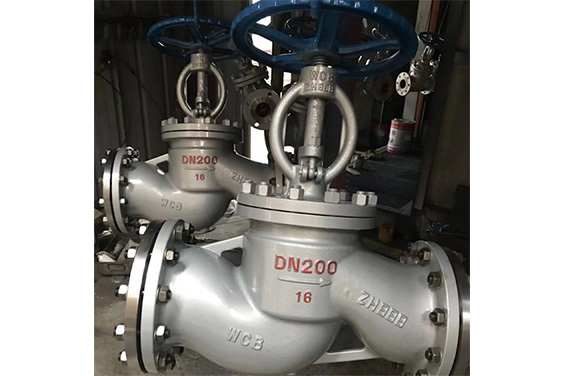
To ensure that globe valves conform to the required API valve standards, they must be tested. Also, to avoid globe valve failures and ensure safe operations, they have to be regularly tested.
A globe valve buyer may also require a valve test before purchasing to confirm the integrity of the valves. Industrial valve manufacturers recommend that globe valves be tested once every year. However, the interval for testing should depend on the operational application, the valve condition, and the required valve output.
Globe valves can be tested for leakages using hydrostatic tests or pneumatic tests. For hydrostatic tests, the test fluid is liquid which includes water or kerosene, while for pneumatic tests, the test fluid is gas which includes air or nitrogen.
Valve leakage standards specify the maximum allowable leakages for each valve under specific conditions. The standards for globe valve leakages and ratings are provided by the API standard 598. These standards test, inspect and examine globe valves.
The following are the types of standard tests that can be performed on your globe valve:
Shell Tests
The shell tests include the Shell Test and the High-Pressure Pneumatic Shell Test. These pressure tests check the strength and soundness of the valve body.
The Shell tests are required for valves that operate in fully open or closed services. The fluid used could be air, water, inert gas, kerosene, or non-corrosive liquids with equal or less viscosity than water.
Open the valve disc and introduce the test fluid into the valve. The pressure applied should be greater than or equal to one-and-half times the maximum working pressure. Check the valve body and cover for leakages. Zero leakage is allowed in this test.
Backseat Tests
Backseat tests include low-pressure and high-pressure backseat tests. These tests check for leakages from the stem or shaft to the seal. The backseat tests allow for the replacement of the valve packing while in service.
For this test, open the valve disc and position the stem or shaft vertically. Introduce the test fluid through the bottom end of the valve disc and check the packing and gasket for leakages. Close the valve disc and check the other end for leakages.
Zero leakages are allowed in this test. While the fluid used in the high-pressure backseat test could be air, water, inert gas, kerosene, or non-corrosive liquids with equal or less viscosity than water, the test fluids used for low-pressure backseat tests can only be air or inert gases.
Closure Tests
Closure tests check for leakages in the valve’s closure element. These tests include the low-pressure, high-pressure, and double block and bleed (DBB) high-pressure closure tests.
For the high-pressure and low-pressure closure tests, apply fluid pressure through one end of the valve (inlet or outlet) and check leakages through the other end. But for the DBB high-pressure test, apply fluid pressure successively through both ends and check leakages in the body cavity.
Only a limited amount of leakage is allowed at the seat sealing surface for low-pressure and high-pressure closure tests.
Air, water, inert gas, kerosene, or non-corrosive liquids with equal or less viscosity than water are the test fluids used in high-pressure closure tests, and air or inert gases are used for low-pressure closure tests.
Visual Check
This test visually checks the valve body, stem, bonnet, and closure element to ensure conformance to valve standards.
Valve inspection and testing methods may differ with different testers. Therefore, industrial globe valves must be tested by qualified and trained professionals.
Common Globe Valve Failures And How To Fix Them
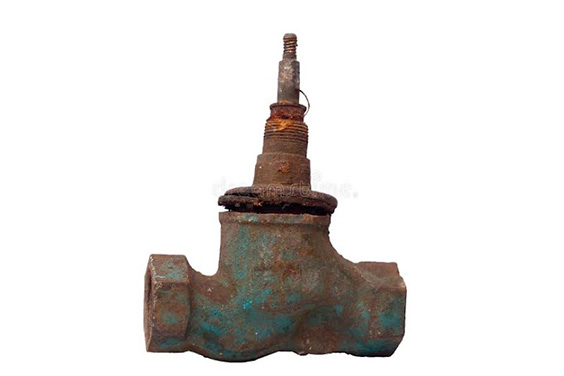
Globe valve failures usually occur due to leakages in the disc, seat, stuffing box, sticking valve stems, and loose valve discs. Also, these failures can be caused by wrong valve size and material selection, poor maintenance of valve parts, or frequent use of the globe valves.
If these problems persist, the failed globe valves may waste good amounts of fluid, which can damage to the system, and lead to costly repair expenses.
Elimination techniques such as repacking the gland, replacement of valve parts, or replacement of the entire valve can be implemented to solve some of these problems.
However, globe valve maintenance practices and preventive measures are cheaper and easier ways of ensuring the valves do not fail. These measures are essential for the optimal operation of globe valves and increases their service life.
Below are some common globe valve failures and ways of solving them:
Globe Valve Failures, Causes, And Solutions
Damage By Corrosion Of Valve Disc
Causes
- Corrosion in the valve disc can be caused by the incompatibility of valve material and fluid in the system, and
- exposure of valve closure element to corrosive testing fluids.
Solution
- Select globe valve closure element based on the nature of the operation, and the selected valve material should be compatible with the system fluid.
- Select globe valves to meet the requirements and specifications of the operation.
Leakage Between Valve Body And Seat
Causes
- Leakages between these parts can result from loose assembly of the valve parts, and
- sand holes within the valve body and seat.
Solution
- Disassemble the globe valve parts and identify leakage areas. If the leakages between the parts can not be welded, replace the valve seat.
- Weld sand holes in the valve parts.
Leakage In The Valve Body
Causes
- Body leakages in the valve can result from cracks and holes in the body during the casting phase of manufacturing, resulting in poor valve structure and strength;
- damage of valve body welding when pulling cracks on the valve.
Solution
- Polish suspected holes and cracks with about 4% nitric solution etching for easy welding detection.
- Grind valve surfaces to remove cracked layers for welding.
- Weld properly to block holes.
Leakage in the packing
Causes
- Leakages in the packing can be caused by improper installation of valve packing,
- rough stem surface putting holes in the packing,
- incompatibility of valve packing material and fluid in the system, and
- loosened packing glands.
Solution
- Inspect packing glands and adjust them to the correct position.
- Properly install valve packing.
- Select appropriate packing for operation.
- Repair or replace stem if required.
Bending and Breakage of Stem Head
Causes
- This mode of globe valve failure occurs when valves are operated improperly. For example, shutting the valve forcefully.
- This failure is also caused by too tightened or too loose valve threads, and
- use of valve for very long periods.
Solution
- Properly operate valves.
- The materials of the threaded sleeves should be selected according to the valve requirements.
- Replace valve stems if required.
Cracks In The Valve Seat And Disc
Causes
- These cracks can result from the large differences between the temperature of the two sides of the valve, and
- breakages in the welding overlay.
Solution
- Treatment valve parts with heat.
- Resurface the valve parts by grinding before welding (if required).
Leakage In The Valve Cover Surface
Causes
- Leakages in the valve cover surface can result from loosened or too tightened bolts,
- damaged gasket in the valve cover, and
- rough bonding surface.
Solution
- Tighten bolts with consistent force and equal pressure around the surface.
- Disassemble to check the cause of roughness in the bonding surface.
- Clear bonding surface.
- Replace gasket if necessary.
Leakage In The Valve Disc and Seat Surface.
Causes
- Leakage in the sealing surface may result from improper grinding operations,
- loosened bolts,
- large space between valve disc and stem, resulting in the low-hanging disc and little or no contact,
- incompatible sealing surface material, and
- a large number of impurities on the sealing surface.
Solution
- Proper valve operation, opening, and closing should not be done with excessive force.
- Regrind improperly grinded surfaces.
- Overlay sealing surfaces to remove impurities.
- Adjust valve flap and stem connection.
- The valve flap may be replaced if irreparable.
Inactive Valve Stem Lift
Causes
- The reasons for an inactive valve stem lift are high pressure at the packing area,
- not enough space between the valve stem and packing gland,
- damaged stem and stem nut,
- non-adjustable packing gland,
- poor maintenance of the stem,
- the increased temperature at the stem area.
Solution
- Use stronger devices to unbolt the packing gland.
- Increase clearance between the valve stem and packing gland.
- Change valve stem and nut.
- Tighten gland bolts with equal pressure across the surface.
- Lubricated using graphite powder in high-temperature conditions.
Valve Flap and Stem Failure
Causes
- Improper installation practices can cause the failure of the valve flap and stem, so that valve parts are not placed correctly and tightened, resulting in loosened bolts and misplaced bullets;
- Worn out valve parts due to frequent use and long operation time.
Solution
- Disassemble valve and reassemble properly.
- Regular globe valve maintenance with shortened intervals.
- Ensure valve parts conform with quality standards and requirements.
Globe Valve Maintenance And Preventive Measures
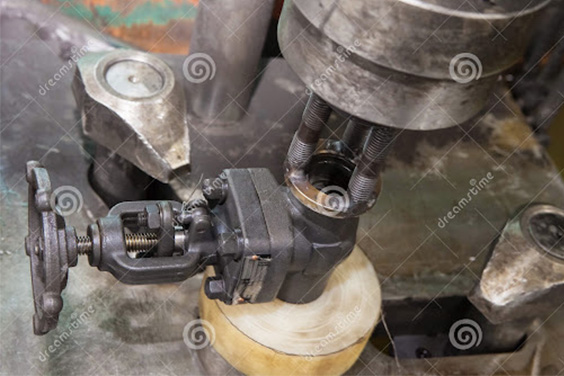
Globe valves operate in optimal conditions when maintained properly. They function effectively if failures and constant repairs are avoided. Globe valves are manufactured to have long service lives, but their operation and how long they last would only depend on the care, attention, and protection they are given.
Globe valve failures are dangerous and sometimes the globe valves require expensive repairs and replacement to become functional again. But these failures can be avoided.
Below are some ways globe valves are properly maintained and globe valve failures, avoided:
Proper Installation Techniques
Globe valves are unidirectional valves; hence, installing the valve correctly decreases wear and tear in the valve. Globe valve maintenance is easy and uncomplicated when the valve has been installed properly. Proper installation techniques are explained later in this post.
However, the valves must be installed following the manufacturer’s guidelines as the installation process may differ from company to company.
Frequent Checks And Inspection
The interval for globe valve checks and inspection depends on the fluid in the system, the amount of times the valve is cycled, and the fluid pressure.
Check the external parts of the valve for wear and tear during the inspection. Also, the valve should be cycled during inspections if the valve is not operated regularly. Cycling the valve ensures that the valve guide is not stuck to the seat.
Drain the valve of pressure and disassemble the valve for inspection of the internal parts. Carefully check the interior areas for wear, leakages, bending, and breakages.
Maintenance of Globe Valve External Parts
The valve stem, handle, outer body, nuts, bolts, and other external parts are often exposed to debris and solid particles that hasten the degradation of the valve parts. Check and lubricate the moving joints of the external valve parts to ensure smooth operations.
Globe valve repairs should be done on faulty or damaged areas during maintenance. Replace parts that are damaged beyond repair or parts that require constant check and monitoring. Tighten loosening bolts as they tend to unscrew during operation.
Clean valve external parts with a cleaning solution and remove sludges or fragments on the valve body. Check the valve handle for liquid deposits and clean it off properly to prevent slipping while controlling it.
Maintenance of Globe Valve Internal Parts
Uncouple the globe valve in the reverse method of installation. Check valve disc, seat, backseat, and other internal parts for signs of degradation or damage.
Carefully Inspect the valve body for debris or residue and dislodge any buildup of scales. Remove any Internal scratches or marks by sanding down with an abrasive compound. If the marks are wider, use more sophisticated machines to remove them.
Globe valve repairs, such as welding or grinding, can be done on internal parts and surfaces that show signs of leakages or roughness. Replace parts with reduced functioning abilities.
Change gaskets and o-rings while reassembling to ensure the tight sealing ability of the valve.
Regular maintenance of globe valves substantially increases the service life of the valve. The best practice is to create an inspection and maintenance schedule involving regular checks on the internal and external parts of the globe valve.
Also, proper installation of globe valves prevents valve failures. Below are some installation best practices to consider while installing globe valves.
Globe Valve Assembly And Installation Guide.
Installation Of Globe Valves
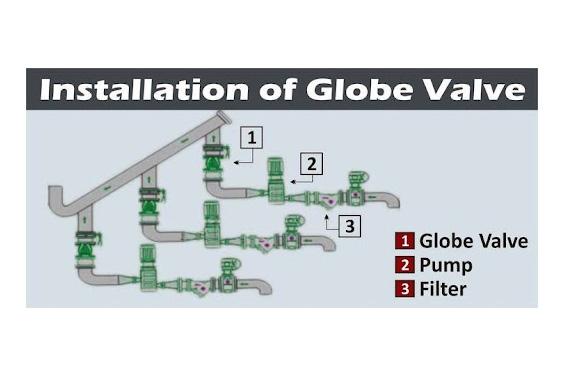
Proper installation and assembly can prevent various premature globe valve failure modes.
Globe valves allow fluid in one direction, and the flow direction can be checked by looking into the valve.
Installing the globe valves in a vertical orientation and cleaning the internal areas of the valve before installation are some proper installation practices. Some others include:
- Ensure the interior of the valve is cleaned of liquids before installation.
- Support the valve load properly as pipe clampings may damage the valve parts.
- Space for operations activity should be ensured during installation.
- Bolts should be tightened with evenly distributed pressure (diagonally).
- Test the bolts with gradual increases in fluid pressure. Fluid pressure is also increased to confirm the reliability of the seal.
- The materials of the globe valve components should be checked to ensure no damage was done during the transportation or storage of the components.
- Ensure that the pressure ratings of the valve matches with the requirements,
- Ensure there is no residue on pipe flange surfaces before contact with the valve body.
Assembly Of Globe Valves
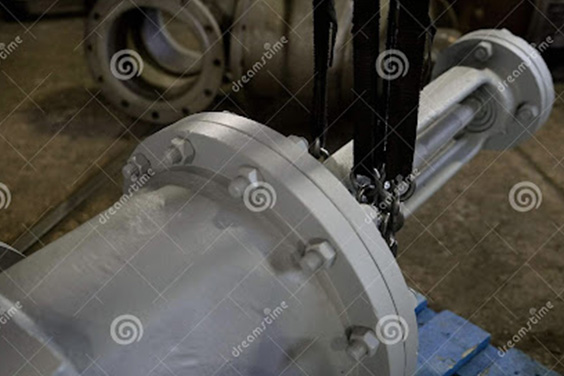
Below is a step-by-step guide on how to properly assemble globe valves:
- Clean and dust all globe valve parts.
- Attach the valve stem and disc in the arrangement provided.
- Rub threads with grease and, from below, screw in the stem through the yoke nut. Gland and gland flanges should be arranged in the correct order in between.
- Attach the wheel handle and nut, and screw it tight.
- Turn the handle and allow the valve stem and disc to move down.
- Attach a new gasket to the valve body in the space provided, applying grease on it for high-temperature conditions.
- Attach the valve disc to the seat and center it correctly.
- Set, but do not tighten the nuts and bolts. Check from the space between the valve body and the bonnet if the valve is properly centered.
- Open the valve and observe how the space between the valve body and bonnet reduces until they come together.
- Set the gland packings in the stuffing box. Ensure that the cut parts do not have any space between them and that the packings are staggered.
- Push the gland nut and flange down while you insert the gland bolts. Gland bolts should be loosely tightened. The bolts will be tightened during installation.
- Check the valve disc movement by opening and closing several times. Check through the flanges to see if the disc is placed correctly on the valve seats when closed.
To get a perfect installation, only qualified professionals with experience in operation should install and assemble globe valves.
Globe Valve Seat Replacement Guide
Globe valve seats are sealed against the valve discs to ensure proper shutoff of fluid. When damaged, the valve seat can be repaired or replaced (Valve Seat Material Selection Guide).
In some less critical cases, the solution, after troubleshooting the globe valves, may involve the repair of the valve seats. However, critical cases, such as a wide breakage of the valve seat, or complete degradation of the valve seat material, require replacement.
Follow the steps below to replace globe valve seats:
- After disassembling the globe valve, remove the old valve seat (valve should be disassembled in the reverse of the valve assembly)
- Ensure the new seat’s surface and other surfaces are clean of foreign materials.
- Ensure there is enough space around the valve body for the operation.
- Apply grease to the seat surface to aid adjustment.
- Attach the valve disc to the seat using a false stem.
- The attachment between the valve disc and seat can be properly bonded by hammering the end of the false stem.
- Ensure that the disc and stem are in line and that the stem is properly centered.
- Use the false stem to position the disc.
- Test the contact between disc and seat by using force on the disc to observe its impression on the seat.
- When there is a uniform impression, the valve seat is ready to be reassembled.
Globe Valve Handle Replacement Guide
Globe valves are controlled using manually operated actuators or automatically operated actuators.
The manually operated actuators (handwheels, cranks) in globe valves can be replaced following these steps:
- Fluid should be drained from the pipeline.
- The valve should be turned to a closed position.
- Loosen connecting bolts and nuts.
- Uncouple and remove the valve handle.
- Replace the old valve handle with a new one.
- Reassemble the valve with the new handle part.
- Put the valve back in operating service.
- Test-run the valve handle to ensure that the problem has been solved.
The automatically operated actuators are replaced following these steps:
- Disassemble the top section of the valve.
- Define valve body type and install teeth in a clamp if the valve is a threaded type valve.
- Place the clamp over the top of the valve and tighten evenly using the two screws provided.
- Install the nut on the threaded valve stem. Additional nuts may be required, but nuts are not required for a notch-type stem.
- Install the stem adaptor on the valve stem located just under the nut or notch.
- Tighten with a thumb screw first, followed by a stem wingnut.
- Install the linkage riser correctly to ensure proper alignment and tighten.
- Install the actuator and connect it with the stem.
Conclusion
In this post, test procedures, installation guidelines, and proper maintenance practices of globe valves were discussed. Also globe valve failures, their symptoms, causes, and solutions were highlighted.
Dombor is an industrial valve manufacturer in China that offers superior valve solutions that complies with market requirements and pipe specifications. We are highly rated for manufacturing suitable valve types in various conditions. You can contact us to get high-quality isolation and throttling globe valves.


