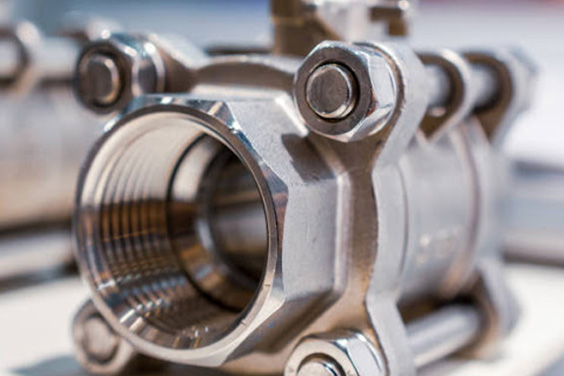
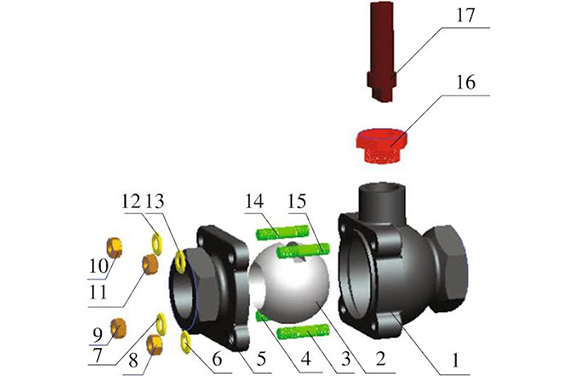
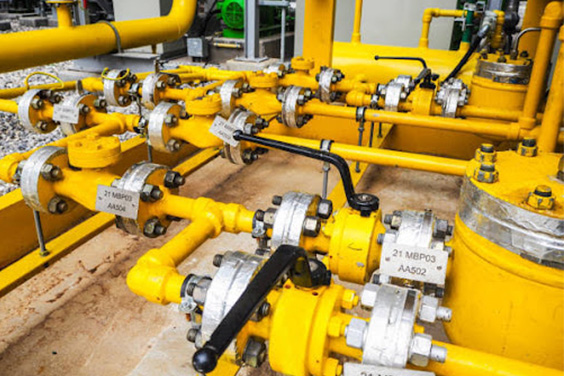
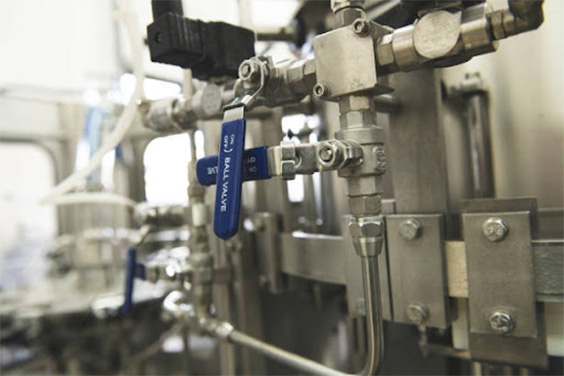
Ball valves are industrial appliances that open and close the control of flow in various pipeline systems, and they use an internal rotary ball as a mechanism to do that. Ball valves open when the hole in the ball allows the inflow of media and closes off when the handle of the valve is turned ninety degrees, blocking the flow as a result.
Ball valves are reliable; they function well even after several cycles, and in the case of long-term inactivity, they still close securely. These qualities make them a standout preference over gate and globe valves for control and close-off applications. Nevertheless, these qualities do not mean that they don’t have problems.
This article, therefore, dishes out a complete guide to problems faced by ball valve users, how to easily repair ball valves, handle and seat replacement guides, and other ball valve troubleshooting methods.
How To Test Your Ball Valve

Like most industrial devices, ball valves degrade due to extensive usage. Regardless of how well they are taken care of, the parts will eventually wear off and break down. As a result, it is important to assess the valves to ensure optimal safety.
Pressure testing of your ball valves may be done regularly or at the earliest indication of damage.
Ball valve testing is not only performed as a maintenance procedure but also to ensure that they meet industry requirements and regulations. In testing pneumatic ball valve strength, the valve body should be partially closed.
Sealing Performance Test
The following are easy steps to access the seal on the different types of ball valves.
Sealing performance test for floating ball valve:
- Ensure the valve is partially open.
- Let in the liquid through one port and ensure the other one remains shut.
- Swivel the ball several times and close the valve ensuring there is no leakage from the shut port.
- Also, ensure there is no leakage in the stuffing and O-ring.
- Finally, pour the liquid from the other end and repeat the above steps.
Sealing performance test for a fixed ball valve:
- First, ensure the ball is rotated several times without load before the test.
- Then, rotate the ball valve to the closed side and let in the specified value of the test liquid (medium) from one port.
- Determine the sealing performance of the lead-in end with a pressure gauge. The accuracy of the pressure gauge should be between 0.5 and 1, with the range being 1.5 times the test pressure. The valve is seen as qualified if the pressure doesn’t drop.
- Then, introduce the test medium from the other port and repeat the above test.
- At the same time, ensure that there is no leakage in the stuffing and gasket ring.
- Finally, ensure the valve is half open again. Shut both ports and fill the inner cavity with the test medium.
Testing the three-way ball valve should be done in every position.
Note: It is important to change a valve with clear damages even if it passes these tests. This is because visibly damaged ball valves may eventually cease to function later despite working for a while.
The constant examination is therefore crucial to sustaining a safe environment for industrial processes. Also, ensure compliance with industry laws and local rules regarding ball valves in general.
Common Ball Valve Failure And How To Fix Them
Most of the ball valve problems result from incorrect installation of the valve part or the installation of wrong parts. The most common causes of ball valve problems are an accumulation of dirt and water residues within the valve.
Ball valve failures also include fluid spillage, stuck valves, rot, and even overheating, which makes the valve malfunction. The ball gets blocked by solvent cement glue, which could cause the ball to stick to the inside of the valve, thereby deterring it from turning. The valves wear out quickly when the ball valve seats are too tight.
During operation, wear and tear happen due to frequent switching to open and close the valve. Also, some valve parts erode, making the ball valve not work properly.
These failures prevent users from maximizing the use of these valves due to their malfunction. Hence, it is important to understand some common problems faced with ball valves and their solutions.
1. Unable To Shut off Ball Valve
Main Reason
Ball valves that have been inactive for a long time may spill liquid (media) when turned off, especially if it has valve sealing problems. Sometimes, changing the valve may prove difficult, especially if the bad valve is tightly fitted.
Solution
- To fix this problem, first, use a pair of pliers to tighten up the fittings and observe if the leaking stops.
- If not, change the seal within the valve or buy a completely new valve.
2. Ball Valve Won’t Close Completely
Main Reason
In some cases, the ball valve cannot completely shut off and closes only partly, and it may be important to change the valve seat or get a new valve that is reliable.
Not all valve seats can be replaced. Only those with six sides and angles or a screwdriver slot can be removed.
Solution
- Get a new valve as a replacement.
- During valve replacement, ensure that water supply to the lines that are being operated on is closed.
- Make sure that the pipe is cut off and replace the former valve with a metal saw.
- Connect a new piece of pipe to the cut-off part.
- Next, ensure the new ball valve is now put in place.
- Allow the flow of water and inspect for any loose connections or spills.
It is important to make sure that the issue of a partly open ball valve is addressed. It needs handling because a shut-off valve that does not fully close can not perform its duty in severe conditions, causing spillage of harmful gaseous substances or leaving an area filled with water.
3. Stuck Ball Valve
Ball valves are commonly used as an off-and-on valve, which implies they should either be fully open. They function by either ensuring free flow or blockage of media.
Sometimes, loosening a PVC ball valve may be essential to preventing it from obstructing the fluid flow of liquid.
If a ball valve is stuck, carry out the following steps to address the problem:
Step 1: Manual Operation
- Shut off the supply of water.
- Next, open and close the valve by turning its handle several times to loosen the valve.
- Release the specks trapped between the valve’s body and the ball by mildly hitting the valve body several times. Ensure a PVC valve isn’t hit roughly; otherwise, it ruptures easily.
- Shake the valve handle mildly to service the ball component and cause it to move.
- Take out the handle and, using a plier, turn the valve a little to aid its free movement. Refix the handle on the valve with the help of a screw.
If these steps fail to work, progress to the next step:
Step 2: Use a Lubricant.
- Spraying lubricants like WD-40, which stands for Water Displacement, 40th formula. With this, the handle will enter the valve body, helping to remove the rust and corrosive metals causing the ball valve to get stuck.
- Let the valve sit for a while after spraying.
- Attempt opening and closing the valve by moving it front and back.
- If it doesn’t move, don’t force it. Rather, lubricate it again and let it sit. Sometimes, you’ll need to leave it for long hours.
- Finally, after a few hours, grip the handle with a pipe wrench and turn the valve. If it gets unstuck and moves, let the water run and keep turning the ball valve to loosen it.
- Replace the ball valve if it remains stuck.
It is important to ensure that the WD-40 lubricant is not used on plastic-based valves because it can melt the plastic when applied.
4. Leakage in Ball Valves
Causes of leakage in the valve during installation:
- Damage to the valve can be caused by inappropriate transportation and lifting, resulting in valve leakage.
- Unaddressed corrosion of the valve may lead to the breakdown of the sealing surface, resulting in the ball valve leaking.
- Unsafe installation site.
- Lack of blind installation at both ends of the valve.
- The absence of lubricant in the valve seat during installation allows impurities such as rainwater and debris to access the rear of the valve seat.
- Presence of burrs during welding.
- Inappropriate installation of the valve in a partially open position can cause damage to the ball and lead to leakage in the valve.
- Incorrect limits during installation and misalignment of stem drive with assembly.
- Welding remnant and other installation residue leave marks on the sealing surface, causing leakage in the process.
Causes of leakage in the valve during operation
- The commonest cause of leakage in the valve during operation is the lack of correct maintenance methods by the operation manager.
- Construction residue leaves marks on the sealing surface during regular operation, resulting in leakage.
- Long-term inactivity of the ball and valve seat causes them to lock and damage the surface of the seal when the valve is opened and closed.
- Ball valve leaking can happen when the ball valves incline by two to three degrees.
- Accumulating rust, dust, and debris between the connector and stem ensures the valve fails to get in place, causing a leak.
- The general actuator has its limitations. If it stays active for a long time, it will begin to erode. The limit bolt becomes loose, and the grease will harden, thereby causing internal leakage.
- Leakage also occurs when the valve position of the electric actuator is at the front and not close to the wrong position.
Troubleshooting methods for the ball valve leakage
- The first step is to examine the valve limit to ascertain if the spillage can be addressed by modifying the limit.
- Then, slowly apply a lubricant to stop the leak. Meanwhile, take note of the change of the pointer pressure gauge to check if the leakage persists.
- Sometimes leakage occurs because of damaged sealing surfaces. Hence, applying valve cleaning fluid to clean the surface and seat is recommended.
- Open and close the valve several times as you reapply the lubricant from time to time, releasing the waste out of the sealing surface and valve seat chamber.
- Check the completely closed position for leakages. If any, apply intensified sealing grease.
- Also, ensure the valve cavity is aired as it produces a big pressure difference which helps the sealing process.
- Finally, the valves should be replaced entirely if there is still leakage.
5. Worn-out O-ring
Main Reason
The valve’s O-ring wears out with time because the ball valve is continuously shoved against the ball valve.
Solution
- This failure is normal. The only solution is to replace the old O-ring with a new one when symptoms of wear surface.
- Also, reducing the intensity of fluid flowing within the valve can help its life span.
- Actuator Issues
Main Reason
It is important to determine the cause of this ball valve problem, as it will be a waste of time and money to repair a ball valve actuator when the problem is with the valve, as some actuator issues result from a valve problem.
Hence, here are some common valve problems that may lead to actuator issues:
- Weak valve stem
- A barrier
- Stuck up packing
- Excessive torque
Solution
Put the system into manual mode and check if it can be manually operated.
In electric actuators, make sure that the applied voltage is not too high to reduce the risk of valve overheating.
Ball Valve Assembly and Installation Guide

Understanding how valve installation works can aid the prevention of leaks and solve other issues about water leakage. It is important to analyze valve orientation and installation.
Valve Installation and Maintenance Procedure

- The installation of industrial ball valves can be done in any direction. It is, however, important that the installation is done with the drive shaft in a vertical position to reduce the load on the valve caused by the actuator.
- Before installation, examine the ball valve body and seat material to ensure they are without damages caused by transportation or storage.
- Examine the pressure mark of the valve against the application condition.
- Also, examine the temperature mark of the valve against the application requirement.
- Verify the threaded connections (NPT, BSP, etc.)
- Ensure all welding works are completed, and the valve’s temperature is cooled before installing the valve before installing the ball valve.
- Ensure the pipe has no welding debris, rust, or other residues before installation. If necessary, wash with water or detergent.
- Ensure the ball valve is void of rust and dirt by thoroughly cleaning the flange surface or pipe thread that will make contact with it.
- Verify that the ball valve is not misaligned.
- Ensure that the load on the valve is lessened
- Ensure the removal of the valve in metal pipework for maintenance by installing a pipe union.
- Removing the three-piece threaded and two-piece flanged ball valves can be done without disturbing the pipeline.
- Make sure that the bolts on a flanged valve are fastened. Doing so will apply even pressure and form a seal between the valves and flanges.
- After the installation, operate the valve to ensure there were no errors and that it can rotate its complete 90 degrees.
Ball valve Maintenance Procedures
To ensure a lasting uninterrupted operational efficiency of the ball valves, routine maintenance remains the most effective method. These methods may appear to be a task, but they go a long way to ensure that the system runs smoothly and, in the long run, save you money and time.
Ignoring these ball valve maintenance procedures may leave you with malfunctioning machines that may eventually need taking apart or replacing.
Below are easy ball valve maintenance guides to follow:
- Check the actuator if the valve is stuck between open and closed. If the need arises, remove and manually work the valve to check for fault.
- If necessary, remove the valve and examine for unfamiliar objects.
- Excess torque is damaging to the actuator and can be damaging to the internal valve parts.
- If it is not used frequently, rotate the valve monthly or more.
- Ensure the system pressure is lessened before maintaining the valve.
- Change the installation sequences to remove them from pipework.
- Change the valve seats and seals by discarding the end plates.
- Gently press out the ball and end seats with the ball in the closed position. To prevent damage to the cleaned ball surface, use a tender piece of cloth to hold.
- Push the drive stem from within the cavity to uncover the stem seals. Then, reinstall the stem, end plates, seals, and ball. Ensure the usage of only approved lubrication on the seal and test the refit into line as in the installation sequence.
- Conduct frequent inspections of the valve, especially if it works in harsh conditions.
Ball Valve Seat Replacement Guide
Old valve seats should be replaced with better ones to enable efficient functionality. Ball valve seats and materials must be compatible and suited for the application.
The following are easy steps to replacing a ball valve seat:
- Close the valve.
- Loosen all the bolts with a pipe wrench.
- Gently slide off one end before the other.
- Next, slightly let out the ball from the other side.
- Then, remove old seats and replace them with new ones. Ensure the side with a bit of an edge is placed against the ball.
- Check that the seat seals are aligned rightly before sliding them back in.
- Tighten your bolts back up, snug them up and always leave the ball in the closed position.
Ball Valve Handle Replacement Guide

Handles are an important part of ball valves(Know more about Ball Valve Handle Types here). When open, the handle assumes a flat position and goes vertical in alignment when it is closed. This mechanism makes it easy to determine the status of the valve.
A malfunctioning ball valve handle may cause leakage. If the handle is broken, a simple repair will be needed. However, a replacement will be needed in the case of the valve not completely closing.
Ball valves often have handle problems which include breakage from exceeded pressure or temperature. Due to these failures, operating the ball valve can prove extremely difficult and, in some cases, impossible.
Below are steps to replace ball valve handles:
- Order a replacement handle with the same model number from your valve manufacturer. If unable to find the one with the exact fitting, you may want to purchase a completely new valve which could come in handy when you need a backup valve body.
- Ensure the system is in a closed position before removing the handle.
- Due to tight screws in the seam, a screwdriver will be needed to remove the old handle.
- The system must be turned off before removing anything to ensure that the valve is not under pressure during the replacement.
- Loosen the screws using your flat head screwdriver.
- Replace the old handle with a new one and retighten the screws.
Replacing valve handles is not difficult and can help save you time and money compared to changing the fill valve.
Conclusion
A ball valve controls the flow of liquid through it using a rotary bore ball. It’s a less costly alternative than its counterparts with a low maintenance cost.
Like all other types of valves, ball valves experience failures that users have to deal with. However, most of these problems can be avoided by proper ball valve maintenance and care.
In this post, we’ve examined the testing procedures, methods of assembly and installation of ball valves. The common failures, troubleshooting methods, and simple guides to its seat and handle replacement were also discussed. Learn more in how to fix a leaking ball valve.
Dombor valve, as an industrial valve manufacturer, provides you with high-quality valve solutions to fit market requirements and pipe specifications. We pride ourselves on creating suitable ball valve types in various conditions. So contact us today!


